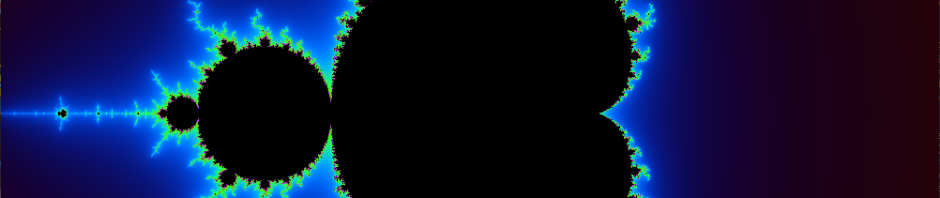
In this post, I will go through step by step how one can make their own Mandelbrot set “explorer,” allowing one to zoom in and out of different parts of the fractal. At the end, the program will produce imagery similar to the heading of this page and the image below. Also if you do not know about the Mandelbrot set, I recommend you read my other post on it or do some quick research, so you are familiarized with the subject. Finally, I assume you have a basic understanding of OpenGL and have some experience with C++ programming, as we will be using both of these. OpenGL help can be found here and C++ can be learned about here (you are welcome to comment for any more help and I will likely respond promptly).
OpenGL
To set up an OpenGL context in Visual Studio 2019+, instructions can be found here and the code for a test window can be found here. From here, we need to draw a rectangle to the screen that will later display the Mandelbrot set. The code below shows how to generate the VAOs, and VBOs.
//these are the vertices used to draw a rectangle covering the whole screen.
float fractal_vertices[] =
{
	-1.0f, -1.0f,  0.0f,
	 1.0f,  1.0f,  0.0f,
	 1.0f, -1.0f,  0.0f,

	1.0f,  1.0f,  0.0f,
	-1.0f, -1.0f,  0.0f,
	-1.0f,  1.0f,  0.0f,
};
//this code will generate the vaos and vbos that the graphics card will use.
//the "Shader" class is a custom class.
Shader shader_fractal(vertex_fractal, fragment_fractal);
unsigned int fractal_vao, fractal_vbo;
glGenVertexArrays(1, &fractal_vao);
glGenBuffers(1, &fractal_vbo);
glBindVertexArray(fractal_vao);
glBindBuffer(GL_ARRAY_BUFFER, fractal_vbo);
glBufferData(GL_ARRAY_BUFFER, sizeof(fractal_vertices), fractal_vertices, GL_STATIC_DRAW);
glEnableVertexAttribArray(0);
glVertexAttribPointer(0, 3, GL_FLOAT, GL_FALSE, 3 * sizeof(float), (void*)0);
Don’t forget to delete fractal_vao and fractal_vbo at the end:
glDeleteVertexArrays(1, &fractal_vao);
glDeleteBuffers(1, &fractal_vbo);
ImGUI
ImGUI is an easy-to-use and C++ compatible GUI (Graphical User Interface) that we will be implementing into our program. A tutorial for doing so can be found here.
This ImGUI code will run in the main loop and create a window called settings with an exit button and and F.P.S. counter.
ImGui::Begin("Settings");
if (ImGui::Button("Exit")) glfwSetWindowShouldClose(window, true);
ImGui::Text("Application average %.3f ms/frame (%.1f FPS)", 1000.0f / ImGui::GetIO().Framerate, ImGui::GetIO().Framerate);
ImGui::End();
ImGui::Render();
ImGui_ImplOpenGL3_RenderDrawData(ImGui::GetDrawData());
Shaders
Shaders, programs that run on the graphics card, will allow us to render the Mandelbrot set. For now, however, the program will simply draw a red screen. The Shader class can be found here and the shader code for shader_fractal can be seen here:
const char* vertex_fractal = "#version 450 core\n"
"layout(location = 0) in vec3 aPos;\n"
"void main()\n"
"{\n"
"	gl_Position = vec4(aPos, 1.0f);\n"
"}\0";
const char* fragment_fractal = "#version 450 core\n"
"out vec4 FragColor;\n"
"void main()\n"
"{\n"
"	FragColor = vec4(1, 0, 0, 1);\n"
"}\0";
To actually render with the shader, we need to call it with this code in the main loop:
shader_fractal.Use();
glBindVertexArray(fractal_vao);
glDrawArrays(GL_TRIANGLES, 0, 6);
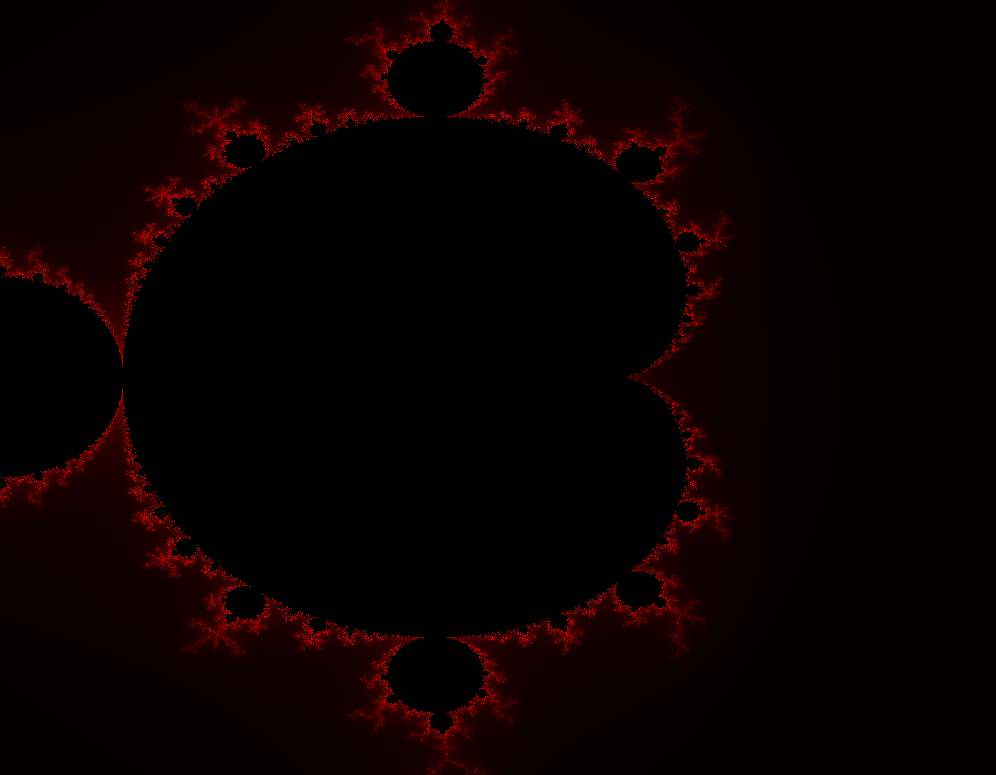
First Simple Mandelbrot
Assuming you saw a red screen (full code), we can make the fragment shader render a crude version of the Mandelbrot set. The FragPos, which keeps track of the pixel position, is fed into the fragment shader as the value for c in the function. The code “z = vec2(z.xz.x – z.yz.y, 2z.xz.y) + c;\n” iterates this equation and we do so max_iter amount of times. To get a true image of the Mandelbrot set, it would have to be iterated an infinite amount of times, but that is not possible in the real world. Instead, it is done at a maximum of 100 times in the shader. Additionally, if the value of z surpasses a radius r from the origin, the loop will be terminated, as the point is outside the set (it is proven that the whole set lies within a circle of radius 2 from the origin). In this case, the number of iterations is used to calculate the red channel of the pixel in “else FragColor = vec4(iter / max_iter, 0, 0, 1);\n”. Otherwise it is discarded, meaning the pixel will be black.
const char* vertex_fractal = "#version 450 core\n"
"layout(location = 0) in vec3 aPos;\n"
"out vec3 FragPos;\n"
"void main()\n"
"{\n"
"	gl_Position = vec4(aPos, 1.0f);\n"
"	FragPos = aPos;\n"
"}\0";
const char* fragment_fractal = "#version 450 core\n"
"in vec3 FragPos;\n"
"out vec4 FragColor;\n"
"void main()\n"
"{\n"
"	vec2 z;\n"
"	vec2 c = vec2(FragPos);\n"
"	float r = 2.0;\n"
"	float iter;\n"
"	int max_iter = 100;\n"
"	for(iter = 0; iter < max_iter; iter++)\n"
"	{\n"
"		z = vec2(z.x*z.x - z.y*z.y, 2*z.x*z.y) + c;\n"
"		if(length(z) > r) break;\n"
"	}\n"
"	if(iter == max_iter) discard;\n"
"	else FragColor = vec4(iter / max_iter, 0, 0, 1);\n"
"}\0";
This should produce the following result (full code):
Movement and Zooming
To move around and zoom in, we’ll keep track of quite a few variables:
//past = previous time, lag = difference in time, scale = zoom amount, (xpos, ypos) = pos, zvel = zoom velocity,
//acc = acceleration, frict = frictional or oppposing force, max = maximum position
float past, lag, aspect, scale, xscale, yscale, xpos, ypos, xvel, yvel, zvel;
const float xacc = 0.1f, yacc = 0.1f, zacc = 0.01f, xfrict = 0.95f, yfrict = 0.95f, zfrict = 0.95f, xmin = -2.0f, xmax = 2.0f, ymin = -2.0f, ymax = 2.0f;
glm::vec4 transform;
aspect = (float)Screen_Width / (float)Screen_Height;
scale = 1.0f;
xscale = scale;
yscale = scale;
xpos = 0.0f;
ypos = 0.0f;
if (aspect > 1.0f) yscale /= aspect;
else xscale *= aspect;
We’ll get the inputs with these functions:
void GetInput(GLFWwindow* window)
{
	if (glfwGetKey(window, GLFW_KEY_ESCAPE) == GLFW_PRESS)
		glfwSetWindowShouldClose(window, true);
	if (glfwGetKey(window, GLFW_KEY_S) == GLFW_PRESS)
		yvel -= yacc * yscale * lag;
	if (glfwGetKey(window, GLFW_KEY_W) == GLFW_PRESS)
		yvel += yacc * yscale * lag;
	if (glfwGetKey(window, GLFW_KEY_A) == GLFW_PRESS)
		xvel -= xacc * xscale * lag;
	if (glfwGetKey(window, GLFW_KEY_D) == GLFW_PRESS)
		xvel += xacc * xscale * lag;
}
void scroll_callback(GLFWwindow* window, double xoffset, double yoffset)
{
	zvel += yoffset * zacc;
}
Finally, we will update the variables in main as such:
xvel *= xfrict;
yvel *= yfrict;
zvel *= zfrict;
xpos += xvel;
ypos += yvel;
if (xpos < xmin)
{
	xpos = xmin;
	xvel = 0;
}
if (xpos > xmax)
{
	xpos = xmax;
	xvel = 0;
}
if (ypos < ymin)
{
	ypos = ymin;
	yvel = 0;
}
if (ypos > ymax)
{
	ypos = ymax;
	yvel = 0;
}
xscale *= 1 - zvel;
yscale *= 1 - zvel;
transform = glm::vec4(xpos, ypos, xscale, yscale);
This should allow for smooth movement and zooming. Here is the full code.
ImGUI Controls
Next, we’ll ad controls for the number of iterations in ImGUI, as well as color_speed and color repeat, which will be used later:
static float color_speed = 1.0f, color_repeat = 20.0f;
static int max_iter = 100;
ImGui::SliderInt("Iterations", &max_iter, 0, 1000);
ImGui::SliderFloat("Color Speed", &color_speed, 0.0f, 100.0f);
ImGui::SliderFloat("Color Repeat", &color_repeat, 1.0f, 1000.0f);
shader_fractal.Setf("color_offset", time * color_speed);
shader_fractal.Setf("color_repeat", color_repeat);
shader_fractal.SetInt("max_iter", max_iter);Here is the updated fragment shader code:
const char* fragment_fractal = "#version 450 core\n"
"in vec3 FragPos;\n"
"uniform vec4 transform;\n"
"uniform int max_iter;\n"
"uniform float color_offset;\n"
"uniform float color_repeat;\n"
"out vec4 FragColor;\n"
"void main()\n"
"{\n"
"	vec2 z;\n"
"	vec2 c = vec2(FragPos) * transform.zw + transform.xy;\n"
"	float r = 2.0;\n"
"	float iter;\n"
"	for(iter = 0; iter < max_iter; iter++)\n"
"	{\n"
"		z = vec2(z.x*z.x - z.y*z.y, 2*z.x*z.y) + c;\n"
"		if(length(z) > r) break;\n"
"	}\n"
"	if(iter == max_iter) discard;\n"
"	else FragColor = vec4(iter / max_iter, 0, 0, 1);\n"
"}\0";
You can find the whole code here.
You may notice that if you zoom in a lot, the image will appear “pixely.” This is due to the limited precision of the number used in the shader. To the computer, points all within the same pixel are essentially the same point, as they are rounded to the nearest value that the variables can store. For now, there is no fix for this, but perhaps I will find a solution to this and write a post about this improved version of the program.
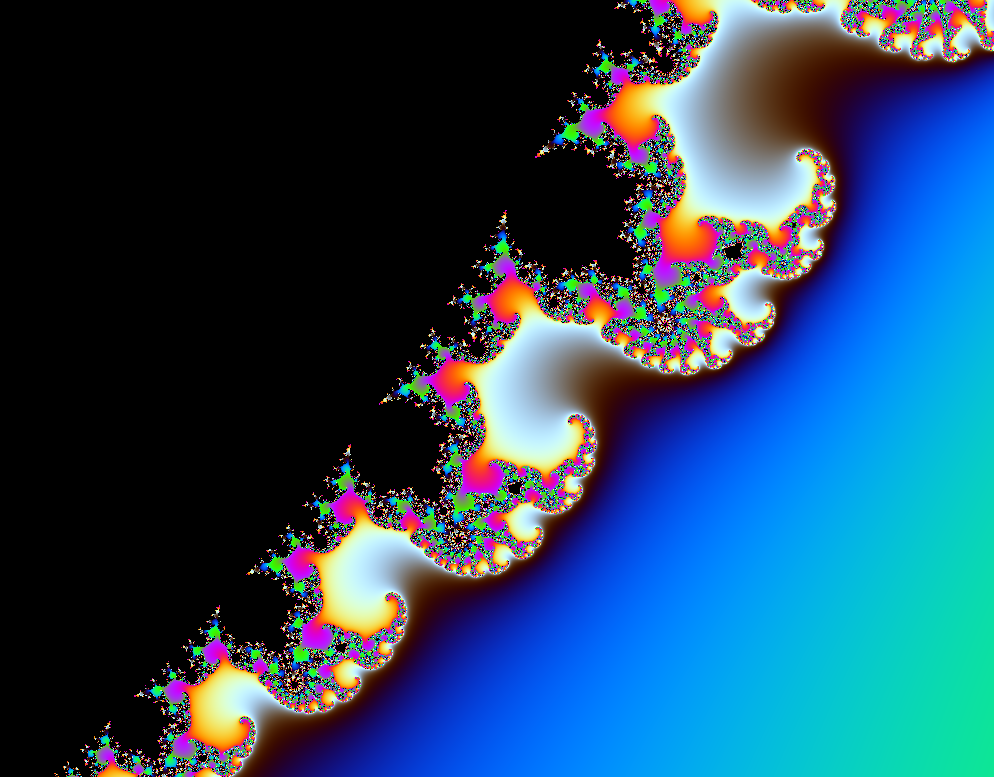
Final Visual Changes
As a last visual step, we’ll add procedural colors by plugging the number of iterations into a sinusoidal function: “FragColor = sin(vec4(0.2, 0.4, 0.6, 1) * m * color_repeat + color_offset) * 0.5 + 0.5;\n”. Here m is the smoothed number of iterations calculated from these equations:
“float dist = length(z);\n”
“float frac_iter = log(log(dist) / log(r)) / log(2);\n”
“float m = sqrt((iter – frac_iter) / max_iter);\n”
This will allow for smooth, blended colors, but you are welcome to replace m with iter for a more “flat-shaded” aesthetic. The final code can be viewed here fragment shader can be seen here:
const char* fragment_fractal = "#version 450 core\n"
"in vec3 FragPos;\n"
"uniform vec4 transform;\n"
"uniform int max_iter;\n"
"uniform float color_offset;\n"
"uniform float color_repeat;\n"
"out vec4 FragColor;\n"
"void main()\n"
"{\n"
"	vec2 z;\n"
"	vec2 c = vec2(FragPos) * transform.zw + transform.xy;\n"
"	float r = 20.0;\n"
"	float iter;\n"
"	for(iter = 0; iter < max_iter; iter++)\n"
"	{\n"
"		z = vec2(z.x*z.x - z.y*z.y, 2*z.x*z.y) + c;\n"
"		if(length(z) > r) break;\n"
"	}\n"
"	if(iter == max_iter) discard;\n"
"	float dist = length(z);\n"
"	float frac_iter = log(log(dist) / log(r)) / log(2);\n"
"	float m = sqrt((iter - frac_iter) / max_iter);\n"
"	FragColor = sin(vec4(0.2, 0.4, 0.6, 1) * m * color_repeat + color_offset) * 0.5 + 0.5;\n"
"}\0";
This should produce the final result: